Overview
While the most accessible forms are built using native HTML webforms or third-party services like Microsoft Forms, if you need to create a fillable form in a digital document format, PDF forms are the best choice for accessibility.
Creating fillable forms in PDFs is a more advanced topic, and assumes a familiarity with accessible document techniques. If you haven’t yet done so, review the Accessible Document Basics and PDF Testing & Remediation Articles.
The basic components of an accessible PDF form include:
- All form fields have a unique name
- All form fields have tooltips
- All required fields have appropriate visual and non-visual indicators
- Form fields are correctly tagged
- Forms have a logical reading and keyboard navigation order
Source Document
As with all other types of PDFs, start with as accessible of a source document (typically a Microsoft Word document) as possible. Do not use Word’s form tools. These Word forms are not accessible, and do not get exported to PDFs. Instead, use your source document to layout the form visually, making sure each form field has a visible label, making sure any relevant fields and the form as a whole have necessary descriptions, and providing space on the document for users to enter values in the form fields.
Export your document using the Create PDF tool in Word, installed in Word when you install Acrobat Pro on your computer.
Creating a PDF Form
Note: Acrobat’s Prepare Form tool overrides the tag tree on your PDF document, and requires extensive tag repair. Most PDF Form resources, including this guide, assume you start off by deleting the entire tag tree, if it exists, creating the form fields first, then rebuilding the tag tree after the form is set up.
Prepare Form Tool
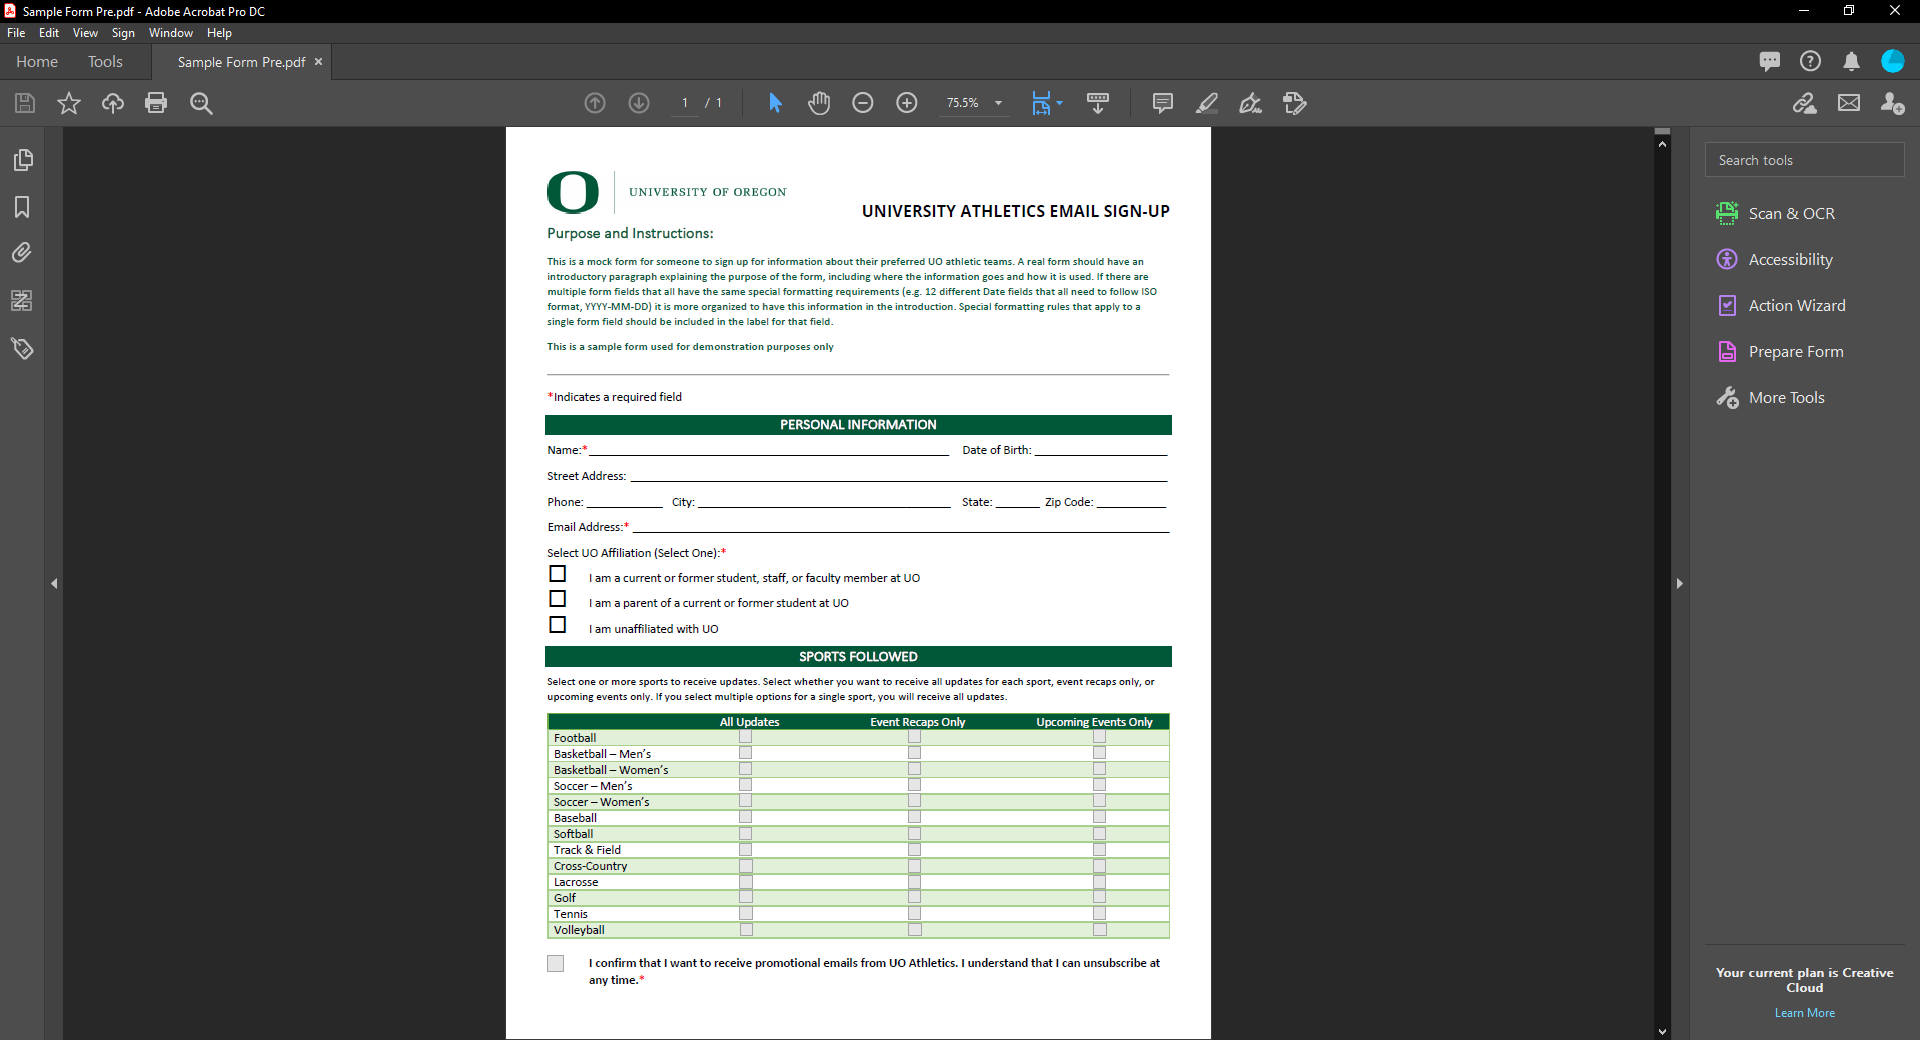
Start by using Acrobat’s automatic form field detection tool. Use the “Prepare Form” tool in the right sidebar of Adobe Acrobat. If you don’t have this tool available in the toolbar, you can find it in the “Search Tools” window.
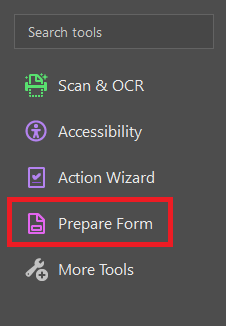
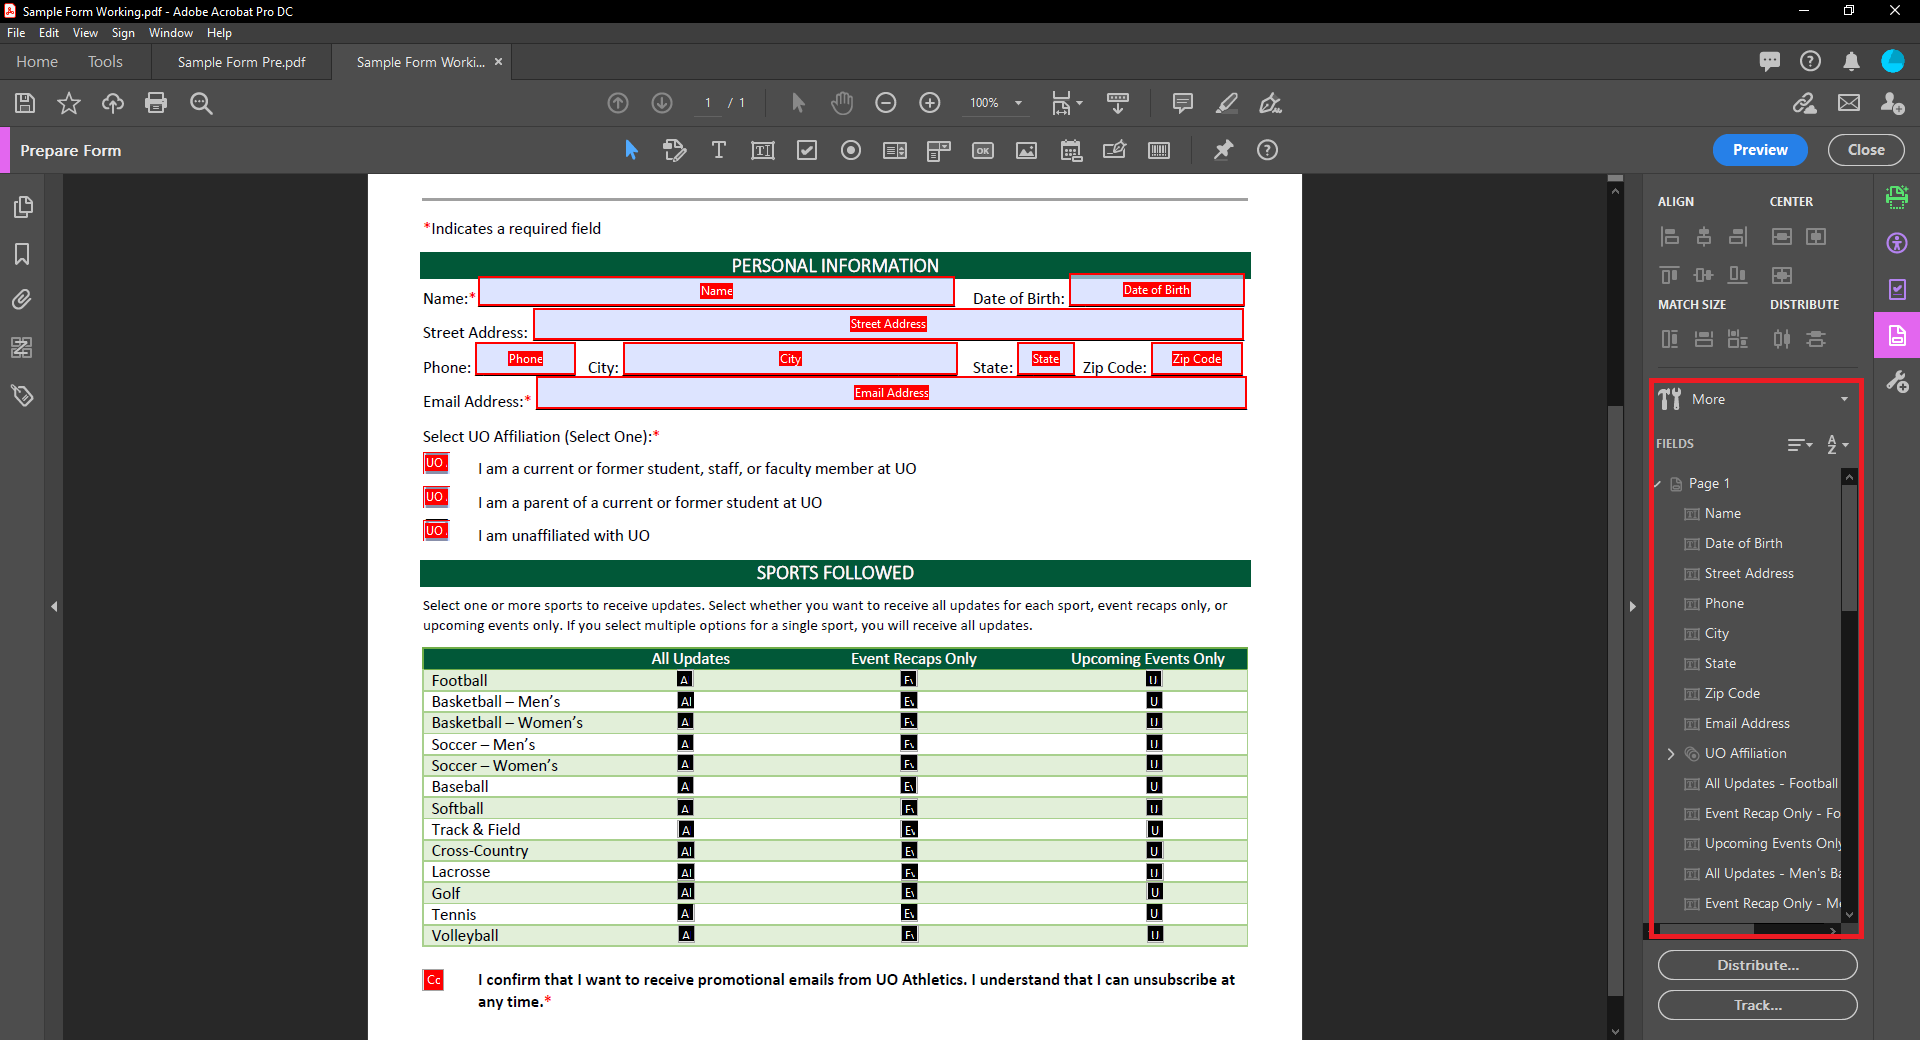
This tool automatically detects and adds form fields based on the visual layout of the file. If you have a simple form, it might identify most form fields correctly, but it is less accurate with more complex forms. All forms should be manually reviewed for accuracy. Here is the sample form after running the Prepare Form tool. The standard demographic information is mostly interpreted correctly, but the checkboxes are inconsistent.
Review and Revise Form Fields
For each form field in the form, do the following:
- Verify accuracy and completeness of form fields. If Acrobat misinterpret, or simply missed adding form fields where they belong, add them manually. The Prepare Form strip at the top of the page has several options for manually adding form fields. Delete any incorrect form fields, click the correct form fields, and drop them (resizing if necessary) in the correct place on the document. There are many options, most common are the Text Field, Checkbox, and Radio Button options.
![]()
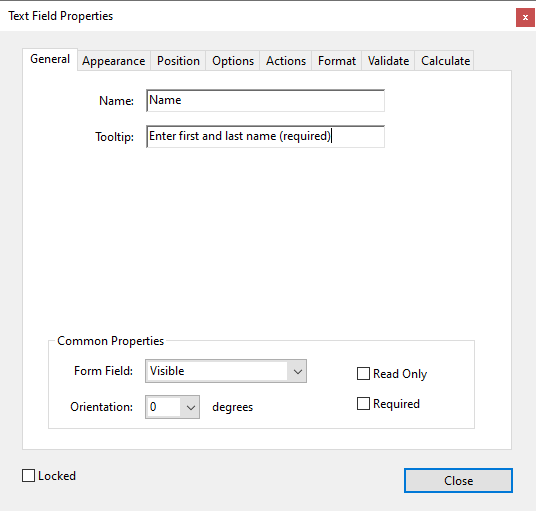
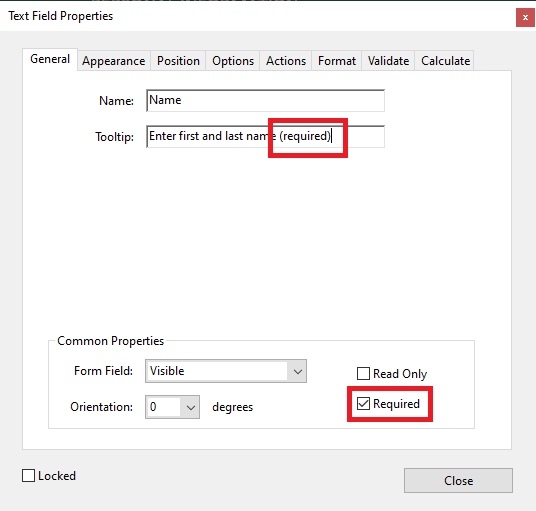
- Verify that the Name and Tooltip is correct. The Name field must be a unique label that identifies that form field. The Prepare Form tool typically takes the visible text label next to the form field and makes that the name value. This value isn’t visible, nor read by a screen reader, but you will use it later in tagging, so make sure it correctly describes the form field. The Tooltip is what gets read by screen readers. Prepare Form often makes the visible text label the Tooltip. This may or may not be sufficiently descriptive to describe the purpose of this input field to someone who can’t see it, so make this tooltip more descriptive, if necessary.
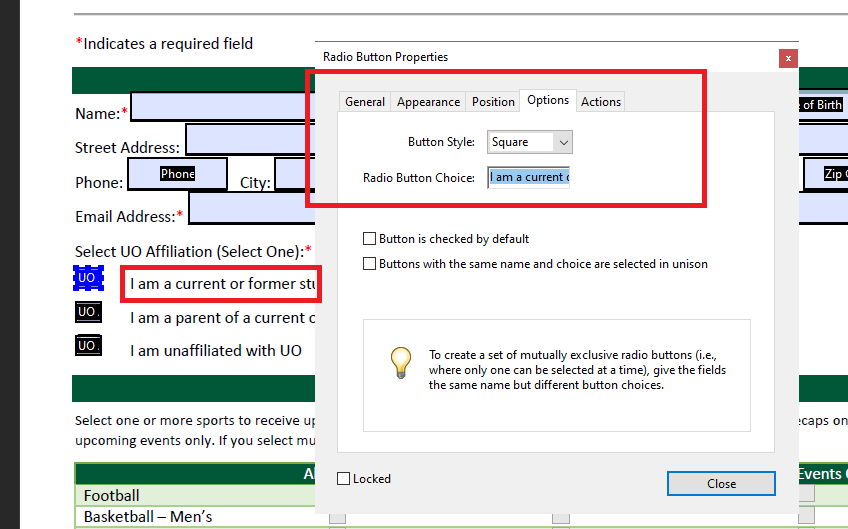
Radio Buttons – when working with radio buttons, the Name must be identical for each option in the radio button group. This tells Acrobat which radio buttons belong to the same group, enabling the “Select One” functionality. The Tooltip should also be the same for each radio button in the group. Because the tooltip will get read multiple times, try to make this tooltip brief. Under the Options tab of the Radio Button, change the Radio Button Choice field to match the visible text label for that radio button option. This gets read by screen readers and tells them which radio option they are selecting.
Checkboxes – Checkboxes do not get grouped together like radio button. They don’t benefit from the additional information in the Radio Button Choice field, so the Tooltip must describe both the question and the value of that particular checkbox. If you had a checkbox list of preferred contact methods, the Tooltips might read: “You may contact me by Phone Call”, “You may contact me by Text Message”, “You may contact me by Email”.
Buttons – Buttons should be used sparingly in PDF forms, because they only work in Adobe applications like Acrobat Pro and Acrobat Reader. They do not work in browser-based PDF readers, so don’t use these unless you are sure they will get used exclusively in Adobe’s desktop applications. If you use buttons, the text that appears on a button can be edited in the Options tab under the Label field. Screen readers will read this Label field unless you override in with the Tooltip field. However, Adobe’s automated accessibility checker will flag this field as an error if the Tooltip field is left empty, so consider duplicating the Label field in the Tooltip field.
Important: Even if a field is marked “required” in Acrobat, some screen readers don’t read this. Explicitly state that is required in the Tooltip.
- Ensure Required Fields are appropriately flagged. First, each required field should have an asterisk (*) in the label, and if you should have a message telling the user, “* Indicates required field”. This should be done in the source document.
Select each form and choose the Properties option. In the General tab, make sure each required field has the Required checkbox checked.
Review and Revise Tab Order
After all the form fields have been added and corrected, verify that the tab order is correct. Some people with disabilities use the keyboard to navigate digital documents. The tab order is the order that a user will navigate through the different form fields when using the Tab key. It should reflect the visual reading order. You can see the Tab order under the “Fields” side panel. If you select the hamburger menu (the three horizontal lines) in the Fields side panel, you can select “Show Tab Order” which will add a number to each form field, indicating the order in which it receives tab focus.
If anything is incorrect, drag-and-drop it into the correct place. Note that any new tags you create will automatically get added to the bottom of the tag order, and will need to be reordered.
Revise Tags and Standard Accessibility Checks
At this point, the form is correctly set up. The main step left is to fix the tags on the PDF. You can either use the Autotag option under the Accessibility tool, or manually add tags. Most forms have minimal non-form content, so manually tagging it may be faster, but either option works.
Form fields, like all other types of content, need to be tagged. This should have been created automatically when using the Prepare Forms tool, but like all automated tools, Acrobat behaves inconsistently.
Each form field should have a <Form> tag with a nested Field Name – OBJR tag. (The OBJR tag stands for Object Reference, and is data associated with the form field). The form label should be read before the form field itself, so the <Form> tag should appear after, and at the same level in the hierarchy as the tag containing the visible text label of the field. It should look like this:
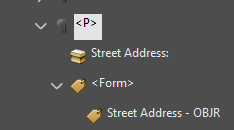
The most common mistake Acrobat makes with automated form field tagging is lumping multiple form field labels under a single tag, then adding multiple <Form> tags beneath it. Each <Form> tag should be paired with it’s own text label.

All the other tagging work follows the same as non-form PDFs. That’s information is covered in the Testing & Remediation PDFs article. Once you finish adding tags, perform the accessibility tests detailed in the regular PDF testing article, and your PDF form is fit for publication.
Additional Guides
Adobe documentation on accessible forms